Once you have all your supplies at hand you are ready to get to work. Most basic procedures apply to all of your tools and will be discussed here. Any tool specific information will be raised in our discussion of individual tool care.
Choose Your Approach to Rust Removal
How you deal with rust is largely dependent on how much rust there is and how hard it is to get at it. If it is on the flat surface of a shovel blade it is one thing. If it is into the cracks and crevices of your pruners, it is another.
In this article we will follow a process much as you would in real life, starting with the easiest and most common rust removal processes first. Then we will advance on to more difficult challenges.
There is one basic principle to keep in mind: you always want to use the least destructive method possible.
The reason should be obvious. Any time you remove rust you will of necessity remove some of the metal construction of your tool.
The First Line of Attack
The best time to get rid of rust is when it first shows up. Fortunately it is a very easy thing to do if you are prepared (as we discussed in the article, Prepare to Get Rid of Rust, which is coupled with this one) and attack rust at the time of its inception.
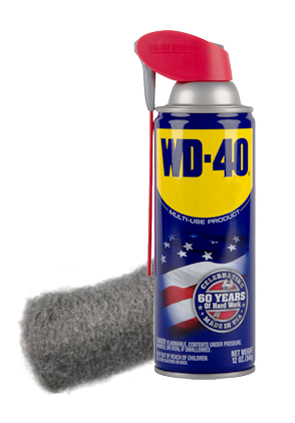
Not only does WD40 used with an oily rag help cut dirt so we can avoid exposing our tools to water in the cleaning process, it is also excellent at cutting rust. Right while we are cleaning our tools, if we spot a little rust all we need to do is put down our rag and pick up some steel wool or a brass wire brush.
If the rust is minor as it will usually be if we are proactive with our tool maintenance, we can use a fine grade of steel wool. If that proves inadequate switch over to a courser grade of steel wool for a few strokes, then finish off with the fine grade. In most cases this will do the job.
At this point we will mention that many people like to use sandpaper or emery cloth instead of steel wool—it works fairly well also but can scratch your tools.
One precaution is called for here. Look out for rust in crevices and joints. Sometimes a small screwdriver or other device needs to be used to push the steel wool into those areas. In some cases it may be necessary to disassemble a tool to get at the rust. But be thorough or it will get worse later.
Removing Larger Rust Deposits
Unavoidably, it seems, there are times when rust gets a bit out of hand. When it does we have to look for a little extra help.
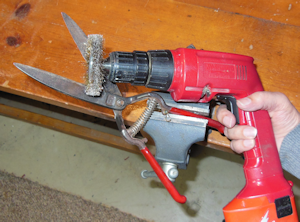
If it is not thick, even a coarser grade of steel wool can clean off a fairly large area of rust, but the best tool to use here is a wheel brush on your electric drill.
You can do this without oil, but if you continue to spray and soak the rust a bit with your oil it will clearly help (provided it is a penetrating type oil like WD40—which is why I have been recommending it).
It will work much better if you can use two hands on your drill, so if at all possible try to secure your tool in a vice. If one is not available try to use another method. I often use clamps for this.
I have found clamping a shovel or hoe handle across a table to work well. You will need to reposition a few times, but it will greatly increase your ability to maintain adequate pressure on the tool.
Dealing with Difficult Rust Problems
Everyone has seen tools that are significantly rusted. Often they appear beyond repair. Honestly, sometimes they are. It depends largely on where the rust is located.
On a pair of grass clippers, for example, if the rust is on the cutting side of the blade they may not be saveable. But if the rust is on the other side of the blade only, even a large amount of rust could be removed and the tool be quite usable.
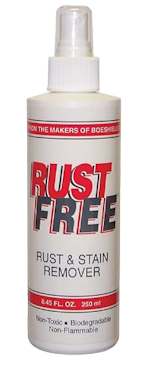
When the previous methods are not adequate, there are special products that you can use which are designed to remove rust from metal. Probably the most popular is called Rust Free. Another that has been used for many years is called Naval Jelly.
These employ chemical reactions to help dislodge your rust. They may take a little time to work but can be very effective.
Save Those Rusted Tools
Good tools are expensive—and they need our help to stay in good condition. It is easy to see that the best course is to prevent rust when you can and control it in the early stages if you cannot. But even if they do get rusty you can usually save them.
If you follow these methods you will do well. As we look at individual tools we will also note any specifics that might be of particular concern with them. Hopefully these ideas will help you care for your own tools and make your gardening more enjoyable.


